Tabs can be used in the Description screen. They can be used to align texts using preset positions (tab stops). To use a tab in the Description screen, press the TAB key.
To change the settings:
- Place the cursor in the Description screen at the required position (the settings will apply to all new text below) or select text (if you only want the settings to apply to a section of the text).
- Choose the context menu Format > Tabs.
- The Tabs window appears, in which you can change the settings for default tab stops or create whole new tabs:
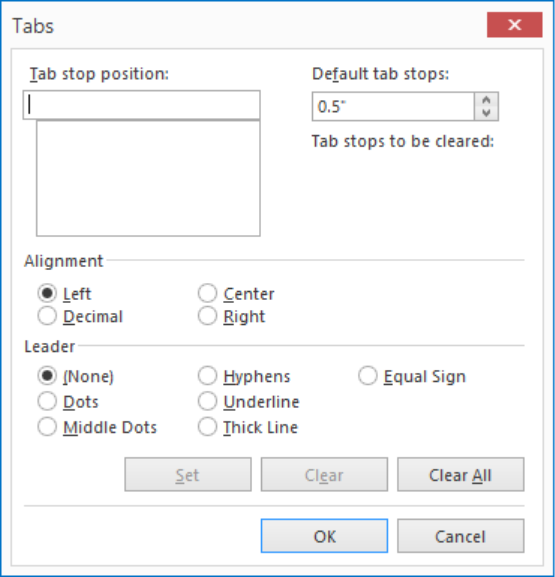
Set Default Tab Stops
Set the number of inches (see Options Description Screen) between the default tab stops.
Set individual Tab Stops
To set an individual tab stop:
- For Tab Stop Position, enter the number of inches at which you want to position a tab, or select an existing tab position.
- For Alignment, you can set how the text will be aligned relative to the tab stop (Decimal tabs can be used to align decimal numbers, all dots will be placed on the decimal tab).
- At Leader you can indicate how you want the empty space next to the tab to be filled.
Note: The individual tabs that you have set will appear on the Ruler, and you can change their position by dragging them. Default tabs are not shown on the Ruler.
Tabs aligned to the left without a leader can be directly set on the Ruler (see Ruler)
Remove Individual Tabs
With the Clear button in the Tabs window, you can remove the selected tab stops. You can remove all individual tabs with the Clear All button.
Note: You can also remove individual tabs directly on the Ruler (see Ruler).